The ATOM Matrix and ATOM Lite are fun little ESP32-based development kits from M5Stack. They can be programmed from the Arduino IDE, although the official instructions for doing that weren’t very good when I was getting started. In this post, I’ll document the steps which worked for me on Windows 10.
1. Drivers
At the time of writing, the documentation from M5Stack seems to say that you don’t need to manually install any drivers before using the ATOM Matrix / Lite. However, that wasn’t the case for me on Windows 10. I had to install the FTDI drivers from here:
These are not the CP210X drivers used by some other M5 development kits.
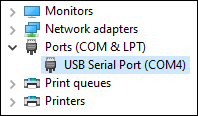
When you’ve installed the driver, connect the ATOM to your computer via USB cable. Open the Windows device manager, expand “Ports (COM & LPT)”, and you should see an entry labelled “USB Serial Port (COM4)”. The number at the end may vary. For example:
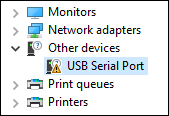
If you haven’t installed the driver then you might see something like this under “Other devices” instead:
What does the FTDI driver do?
Like many microcontrollers, the ESP32 at the heart of the ATOM acts as a UART, communicating via a basic serial protocol called RS232. That protocol has been around for a very long time, and its simplicity makes it useful for embedded systems. However, most computers don’t have a compatible port any more because the protocol is too limited for modern consumer devices.
The ATOM solves this problem in the same way as several similar devices: it contains an FTDI chip. That chip acts as a bridge between the USB connection and the ESP32 UART. Installing the driver allows other software (such as the Arduino IDE) to communicate with the UART as though it were connected directly; it effectively makes the USB part of the connection transparent.
2. Setup the Arduino IDE
These instructions are based on Arduino IDE v1.8.13. The same general steps work in version 2 of the Arduino IDE, but some of the dialogs look a little different.
2.1. Install the desktop IDE
You will need to download and install the Arduino IDE, if you haven’t already. See the documentation here for instructions and links:
It isn’t currently possible to use the ATOM development kits (or any other ESP32 boards) from the Arduino Web Editor, also known as the online IDE. You’ll need to download and run the desktop IDE.
2.2. Boards Manager
Before you can upload any sketches, the IDE needs to know how to work with an ESP32 microcontroller.
To do that, click “File → Preferences” in the IDE. In the preferences dialog, click the button beside “Additional Boards Manager URLs”. It’s the one outlined in red here:
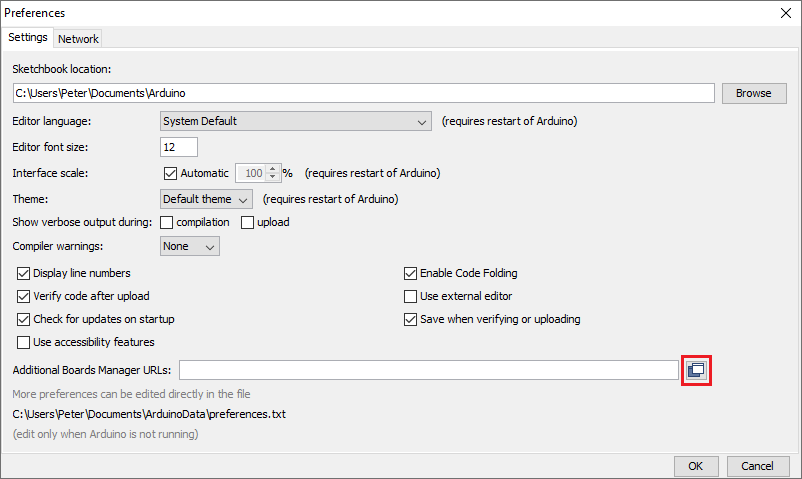 Arduino IDE v1 Preferences dialog
Add the following URL to the dialog which appears:
For example:
 Adding a Boards Manager URL in Arduino IDE v1
If there are other URLs already in the list, then ensure you add the new one on a separate line. If the same URL is already there then you don’t need to add it again.
Click “OK” to close both dialogs.
Next, you need to install the ESP32 board definitions. Open the Boards Manager (click “Tools → Board (…) → Boards Manager”). A dialog like this should appear:
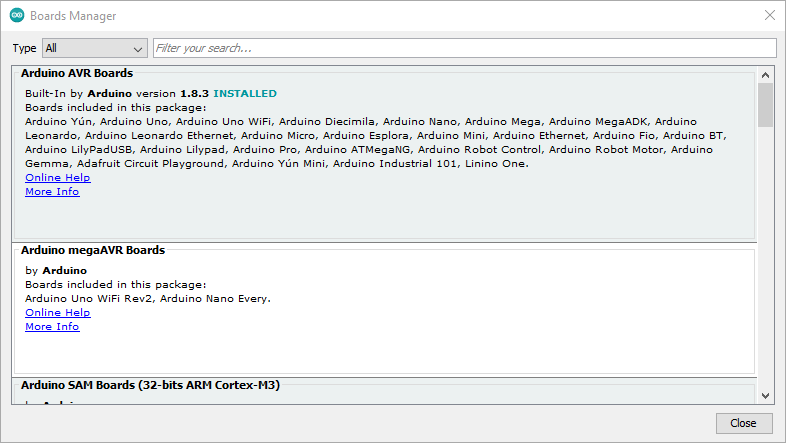 Arduino IDE v1 Boards Manager
In the text box at the top-right, type “esp32” and press enter. When the “esp32” result appears, click the “Install” button. It may take a while to download and install.
2.3. Libraries (optional)
I recommend installing the “FastLED” library if you have the ATOM Matrix or you want to work with external RGB LEDs. It’s widely used, and my experience with it has been very positive so far.
You may also find it useful to install the official “M5Atom” library. It’s not essential for working with the ATOM development kits, but it can provide a useful starting point if you haven’t programmed ESP32 boards before. (Note: If you install the M5Atom library then you must install FastLED too.)
To install them in the Arduino IDE, open the Library Manager (click “Sketch → Include Library → Manage Libraries…”). The dialog will look like this:
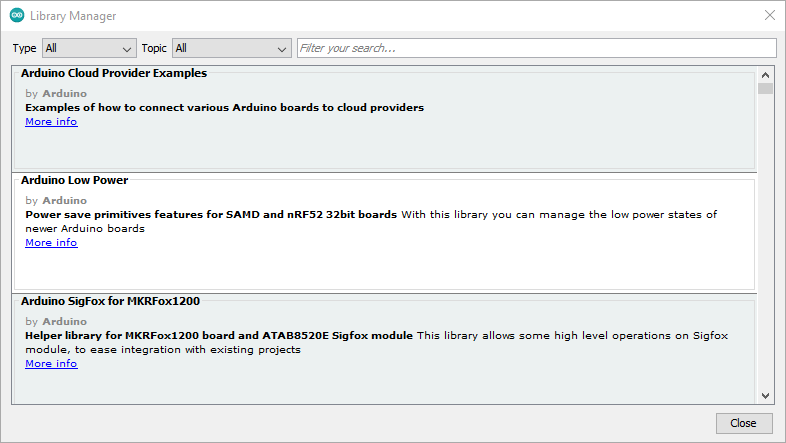 Arduino IDE v1 Library Manager
In the text box at the top-right, type “FastLED” and press enter. When the search results update, click the “Install” button. You can repeat this process for “M5Atom” if you want to install that library too.
For more information about installing libraries in the Arduino IDE, see this documentation:
In case you’re interested, you can see the source code for the libraries here:
2.4. Upload settings
Before you can upload any sketches, you need to configure the IDE to talk to the ATOM correctly. First, ensure your ATOM is plugged-in to your computer via USB.
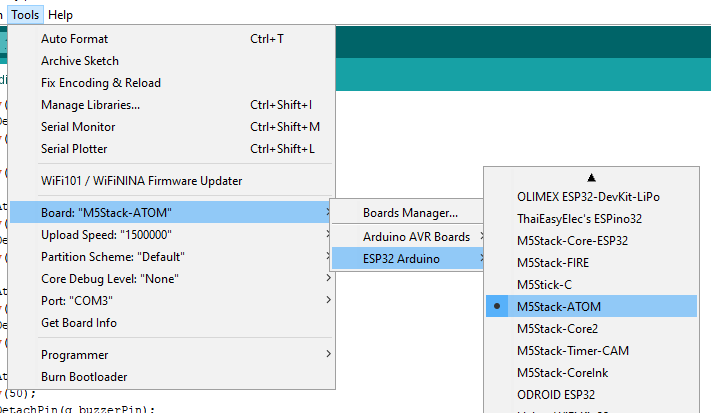
Next, select the board type. In the Arduino IDE, click “Tools → Board (…) → ESP32 Arduino → M5Stack-ATOM”:
 Selecting the board type in Arduino IDE v1
If you don’t see “M5Stack-ATOM” then you may need to update your boards list. Go to the Boards Manager, search for “esp32”, and click “Update”.
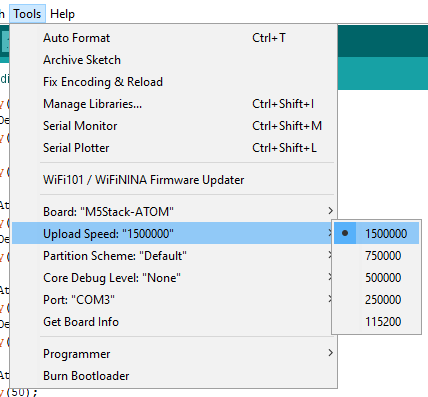
The ATOM development kits seem to communicate effectively at their maximum compatible baud rate of 1500000. You can ensure this is selected by clicking “Tools → Upload Speed (…) → 1500000”:
 Selecting the upload speed in Arduino IDE v1
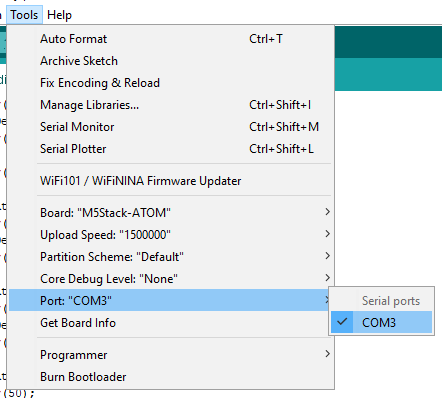
Finally, as with any Arduino board, you need to select the appropriate port. Click “Tools → Port (…) → COMx”. Note that the “x” could be various different numbers, and it might change each time you plug the ATOM into the computer:
 Selecting the port in Arduino IDE v1
3. Upload a sketch
You’re now ready to upload a sketch to your ATOM. Here’s a very simple one which will work on both the ATOM Matrix and ATOM Lite, without any libraries. It simply writes “Hello World!” to the serial output every second:
1
2
3
4
5
6
7
8
9
10
void setup()
{
  Serial.begin(115200);
}

void loop()
{
  Serial.println("Hello World!");
  delay(1000);
}
Upload that sketch to your ATOM. If you need help with uploading sketches, see the Arduino documentation here:
When it’s finished compiling and uploading, open the Arduino IDE’s Serial Monitor (click “Tools → Serial Monitor”). In the Serial Monitor window, ensure “115200 baud” is selected at the bottom right.
You should start to see “Hello World!” repeatedly, like this:
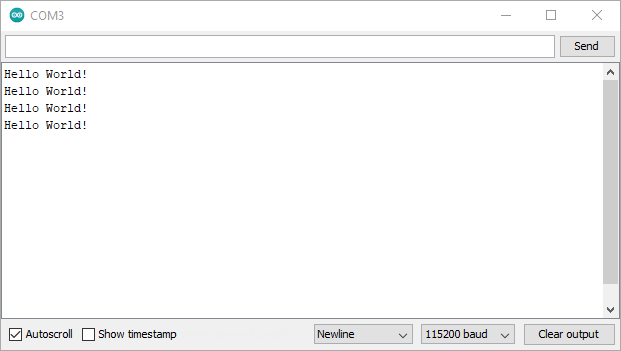 Arduino IDE v1 Serial Monitor
Next steps
Hopefully you’re now ready to start programming your ATOM board.
If you installed the M5Atom library then you can explore the example sketches it came with. To do that, in the Arduino IDE, click “File → Examples → M5Atom”, and select one of the options which appears. You should be able to upload the sketches to try them out, although note that at least one of them only applies to the Matrix, not the Lite.
Unfortunately, there isn’t much documentation for the M5Atom library. However, if you’re familiar with C/C++ then you can take a look at its source code to see how it works.
I’m aiming to write some more posts in future about working with the ATOM development kits, and ESP32 in general. Please check back again in future for more, and let me know if the comments if there’s anything specific you’d like to see.